
Watermarking your photos is your first defense against photo theft. This is a simple tutorial to teach you how to make a transparent watermark that you can simply paste on top of your photos. Let’s get started, shall we? To begin go to PicMonkey.com.
1.) Create a Collage

Open the Collage feature (if it prompts you to add photos just choose the sample photos they provide). Then click the “X” in the top right hand corner of 2 boxes. You should be left with one large white box. Don’t worry about the size of it at this point.
2.) Save a Transparent File
![]()
Click the Background tab and the check the box beside “Transparent background.” Don’t worry, your image is still there. It’s just invisible now.
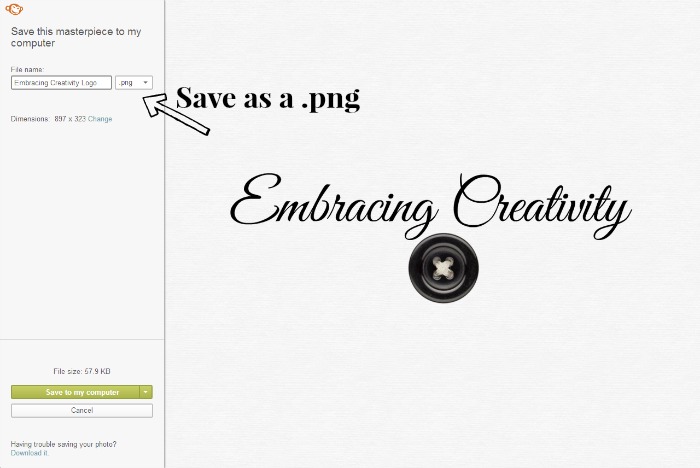
Save your image using the “Save” at the top of the page, name your background image, then save it as a .png file. This is important, it has to be a .png file. You can now close the Collage editor by clicking on the “X” in the upper right hand corner of the page.
3.) Create a Logo

Use the Editor feature to open your transparent background file. Those boxes won’t be in your image; they’re just there to let you know the dimensions of your transparent image.
Click on the Text tab and add the text you want on your logo. Experiment with fonts to find one that’s easy to read and that best represents your brand. You can also change the color at this point but it’s common to use either black or white. Pick a font size that is fairly large, somewhere around 80-100 point should be good. You can always resize it smaller when you add it on top of your image but making it bigger would make it look grainy.
If you’d like to add an image with your name you can browse PicMonkey’s collection of overlays. For this tutorial I chose to add a black button and then rotated it slightly.
4.) Crop Your Logo

Once you’re happy with the way it looks go to the Basics tab and crop it tightly around your image.
5.) Save Your Transparent Watermark
Go now and save it to your computer as a .png file. It needs to be a .png file to be transparent so double check and make sure you’ve selected the right option.
That’s it! Now you can have a professional consistent look on all of your images. Don’t you feel savvy?
**Updated!** To add it to your image follow these steps:
– Go to the “Overlays” tab.
– Choose “Your Own” option at the top.
– Select your transparent .png file from wherever you saved it. Voila!
If you found this post helpful please pin it so others can find it!

Thank You Ashley,
It is so overwhelming when you are older & trying to learn how to navigate this new online world.
You just made me feel as though I might be able to give it a try.
Thank You & Blessings!!!
Oh good, I’m glad I was able to encourage you to give something new a try. Please feel free to email me or message me any time you have PicMonkey or tech questions in general and I’ll try to help you out if I can.
Hello Ashley so I have the app on my phone and it’s been very helpful but I’m trying get the desktop version just like the one you show on your tutorial but I can’t find it. How can I get it ?!
PicMonkey.com?
Thanks for sharing! I’m pretty new to picmonkey, and I love the idea of watermarking my photos. It just makes them look so much more professional. I will definitely be pinning!
Thank you for pinning! PicMonkey has so many fun features and they’re always adding more. I’m a huge fan!
When trying to create a watermark i followed step by step and when i try to add it to my photo it will erase my photo and all i have is the image of the watermark. What did i miss?
I love this. Thank you. I have been wondering how people did that – and now I know 🙂
Me too!!! I recently discovered that a .png file would save a transparent image and I fiddled with PicMonkey until it did what I wanted it to. I’m pretty excited to have discovered it.
I’ve recently noticed how important it is to watermark your images. I would get so upset if someone took my photos without crediting me and unfortunately it happens more often than we realize. Great tips and thanks for making it easy!
It does happen so often! A watermark won’t stop someone from stealing photos if they’re determined to but hopefully it will make people stop and think twice.
Thanks for sharing. I did a tutorial like this but not abut transparent watermarks, this is very helpful.
Oh yea? This is my first tutorial regarding anything of the sort so I’m happy to know it was helpful!
Thanks for the tip! I wish I’d have had this back when I first started watermarking my photos, because it took me a bit to figure something out. I like the way you do this, though, and will have to fiddle with mine and make something new and more fun than just my blog name. 🙂
I’m glad to have finally figured it out too! Creating a new watermark for each and every photo was getting old.
aha! that’s not so hard!! I need a new watermark to match my makeover!
No, it’s not hard at all. 🙂 By the way, I love your new site makeover!
I’ve long wondered how this is done. Thank you for letting me in on that secret. I need it for my pics.
You’re welcome; I’m glad it was helpful!
When you paste it onto your new file, you can also adjust the fade – that actually creates the watermark, and not just a logo stamp.
Oh yes, of course! I’m a horrible teacher because I always assume people know more than they do. That’s a great point to add! Thank you for mentioning it.
That was great!! I followed your tutorial and i loved the result!!! 🙂
Only thing, like Sandra Bottoms said, when I try to past it or add it into another picture or new file (to put my watermark in it) it erase my actual image. What can i do?
And thank you again for sharing! 🙂
Thanks for posting this! I knew you could do it, but I never really wanted to figure it out myself! HAHA!! 🙂
Good, I’m glad to save you some time! 🙂
this is great! So very useful, and it is much easier than I though it would be, thanks for this.
Oh, thank you so much for this. Learning to do this kind of stuff on Pic Monkey is on list of things to do. I’m bookmarking this page.
I’ve been thinking about this lately! Definitely something I need to start doing! Thank you!
wow this is awesome I need to bookmark it! Now is this the free picmonkey?
Great tutorial. I love that you don’t need expensive photo software
to do this.
Such an easy task! Thanks for sharing.
I had no idea you could do that with Pinterest. I have a watermark, I just don’t know how to add it to my images. 🙂
I LOVE LOVE LOVE LOVE LOVE PicMonkey! Great tutorial!
Thank you so much. I have been wondering how to do this.
I love PicMonkey. I use it for all of my images. I had been wanting to do a real watermark for my blog photos though. Up till now, I’ve just been putting my url on the photos. Having an actual watermarked logo looks much more professional. Thanks!!!
I love PicMonkey. I use it for just about everything.
I love picmonkey and use it daily! I love this feature and have done it with logos on some of my giveaway pics!
This is great for the newbies! I use photoshop for all my editing, but my mother loves how simple and easy to use picmonkey is!
I love picmonkey. Wish my watermark would just appear on all my images with no work. Isn’t there a watermark fairy?? Love the step-by-step!
Great tutorial! I love Pic Monkey and even have the paid features. Adding a watermark is something every blogger needs to do! So important!
Thanks for sharing this. I really need to use this!
What a great tutorial! Thanks for this!
Thanks for sharing this. I have been needing a creative way to watermark my pictures!
Great information! Pinning this to my blog board so I don’t forget. Thank you!
Wow, thanks for this! I’ve been wanting to change mine and I had no idea you could do this with Picmonkey.
Ah, thanks! I’ve been doing mine each time. 🙂
This is great! I don’t know why I’ve never made one. I usually just type in my blog url.
I love this. I am always doing this manually over and over. I don’t know why I am washing so much time! thanks!
I LOVE PicMonkey! Thanks for the great tutorial! It’s one I needed!
I do this on mine too because you just never know who will steal content!
Nice I didn’t actually realize this could be done right in picmonkey
I get asked how to do this quite often. Bookmarking to share for later 🙂
Thanks for the great tutorial! This is so important!
Thank- YOU! I don’t know why I find pic monkey sooooo hard to use! ( usually use Pixlr.com…maybe I will give picmonkey another try.
Great tip! I love picmonkey. I use photo editing software to watermark all my pics before I upload them to picmonkey and edit them. This is a great way to do it for free.
Great! Thank you for the “how to”!
I’ve just started using PicMonkey in the past few months. I’ve always used Photoshop, but it’s kind of cumbersome when all I may have to do is add my name to a photo.
Wow this is great! Thanks so much for sharing this with us! I always wondered how to do this!
With all the Facebook pages and blogs that like to steal photos, recipes and crafts from bloggers, it is SO important to mark your content. Great tutorial.
Thank you so much for sharing this tip with us. I just created a watermark image for my blog, and I have been wondering how to do that for some time now. Thank you.
I tried using pic monkey, but I love me some Photoshop! Options are endless in Photoshop.
This is a GREAT step by step tutorial. I just pinned it!
This is wonderful!! I think I may have to use it on mine!
Wow, I had no idea that you could do this in pic monkey!
Pic Monkey looks like a good editing program. Thanks for the tutorial!
Great tutorial! I need to watermark my images on my blog. Picmonkey is so awesome. Love all the neat things it can do.
Thank you! This has been on my list of things to do for months but i never had the time to figure it out.
great tutorial! I use photoshop but I know a ton of people who use picmonkey that would love this tutorial! I’ll have to share!
PicMonkey allows you to design now, custom. So, it’s much easier. 🙂
Great tutorial. I haven’t used picmonkey in quite some time. It’s time for me to get back over there. There is so much you can do there.
This is great. I use PicMonkey just about every day. I love it! I really need to start watermarking my pictures.
I love Pic Monkey. This is a good tutorial too!
Great tutorial. I do this often myself.
I will have to do that going forward as I insert my logos in a much more complicated to get my logo on my photos.
Great tutorial. I love using picmonkey for all my editing and watermark stuff
Very good instructions. Excellent tutorial. I will definitely try this out. Thank you for taking the time to share this.
This sounds very easy, yet I haven’t taken the time to do it. I usually just add a text watermark every time I edit photos. I need to make my own watermark though, as it would definitely save time!
Your tutorial sounds very simple! I need to be better about protecting my photos without making them look too “commercialized” with my URL. 🙂
This is a very helpful tutorial. Pinning this for later. I love Picmonkey!
I found this on Pinterest, and I am so glad that I repinned it! This is very helpful!
Thanks,
Cathleen
http://www.classycathleen.blogspot.com
How cool.. I love to use Pic Monkey and had NOOO idea I could create a watermark.. Thanks for an awesome tutorial…
I use Picmonkey from time to time… It does make watermarking easy to do… Thanks for the reminder.
That is such an easy way to do it. It actually took me a long time to do my watermark in Photoshop, this would have been so much easier!
I love picmonkey a ton. Its one of my fav sites to visit!
Thank you so much for putting together this post! I just created my own watermark, and I can’t wait to use it:)
xx-
Cathleen
http://www.classycathleen.com
Wonderful! I’m glad you enjoyed the tutorial!
ok, so now i feel dumb, but how do i now get the saved watermark on to my pics?
Oh, you’re not dumb! I’m glad you figured it out though. 🙂
Ok I’m dumb I haven’t figured out how to add it to my pictures.
No, you’re not dumb! I should have included that step originally but I have now updated the post to explain how you can add your watermark to photos.
nevermind i figured it out 🙂 Thanks for this!
Please share how you did it! 🙂
Hi Lynn,
I just updated the post with instructions on how to add them to your photos. I’m sorry I didn’t mention it sooner!
How do you add it to your pictures???? :/
I’m sorry, the post is now updated with instructions on how to do this!
Thanks so much for the tutorial! I’ve been meaning to do this for such a long time. I had no idea it would be so easy. I’m watermarking the heck out of my pictures from now on 😉
So glad I came across your post. I have been wondering how to create the watermark and save it to use over again. Anxious to try it this week.
Elaine
http://www.OMGlifestyle.com
How do I put the watermark on my pictures? I haven’t been able to figure it out.
Hi Jes, I’m sorry that I didn’t include that sooner! I have updated the post now to instruct how to add it to your photos. 🙂
Thanks for this tutorial. It was easy! Now I need to paste it on my photos, but I don’t know how. Please help.
I’m so sorry! I should have included that! I have updated the post now to instruct how to add it to your photos. 🙂
You have no idea how helpful this was. Thank you so incredibly much!!!
Oh good! 🙂 That’s encouraging to hear!
Thanks for the Idea.
It worked out great!
How do you then get it on the picture?
I’m sorry! I should have included that! I have updated the post now to instruct how to add it to your photos. 🙂
Hi, great tutorial, but how do I get it to appear on the photos? when I add it is MASSIVE and its the only thing showing, it doesn’t land on top of my photo – would I need photo shop to do this? 🙁 please respond
I’m so sorry! I have now updated the post now to instruct how to add it to your photos. 🙂
great to tutorial, to add it to you picture after you open up the picture you want to add the watermark to, go to overlay (on picmonkey) add your own. Then add your watermark
Yes, exactly. Thank you for answering this question, I appreciate it!
I have the same question. Great tutorial, and I love the watermark I created, but how do I get it to paste on photos? Please help!! Thanks. 🙂
Oh, I’m so sorry! I’ve updated the post now to instruct how to add it to your photos. 🙂
Thank you!! We are new to the blogging world and are trying to soak all this information up. There is so much to do to get everything started. This was so helpful!!
There is a lot to take in. Just take it step by step and you’ll do just fine! 🙂 Welcome to the blogging world!
I wanted to say thank you for posting an easy way to create watermarks. I love PicMonkey and I am starting my business and have never put watermarks. You made it so easy that I am creating many different ones to use depending on my mood! Thank you so much!!!
This worked perfectly for me! Thank you for such a detailed, step-by-step post!
Ashley…do you know away to use your logo to make a watermark in Pic Monkey? I have a great logo, but can’t seem to transfer it to a watermark….thanks
Where did you get your logo, could your designer help? Depending on how complicated it is you could probably do it yourself.
This post was super helpful!!!
New Watermark Created!!
Thank you!
Thank you, Ashley ♥ I’ve used Pic Monkey for a while but lately they seem to want to force me to buy it. So now I’m a newbie at FotoFlexer and will try to do similar steps there. Sounds simple enough, except for maybe steps no. 2-3. I understand the rest, I think lol. Great job and thank you so much! Enjoy your sweet children. Ours are all grown up and flew away.
Thank you so much for sharing this tutorial. It is so easy to follow and very useful! I love this post. I am new to blogging and there is just so much to learn. I finally know how to create a watermark. 🙂
Oh, you’re welcome!! Welcome to the world of blogging!