Watermarking your photos is your first defense against photo theft. This is a simple tutorial to teach you how to make a transparent watermark that you can simply paste on top of your photos. Let’s get started, shall we? To begin go to PicMonkey.com.
1.) Create a Collage
Open the Collage feature (if it prompts you to add photos just choose the sample photos they provide). Then click the “X” in the top right hand corner of 2 boxes. You should be left with one large white box. Don’t worry about the size of it at this point.
2.) Save a Transparent File
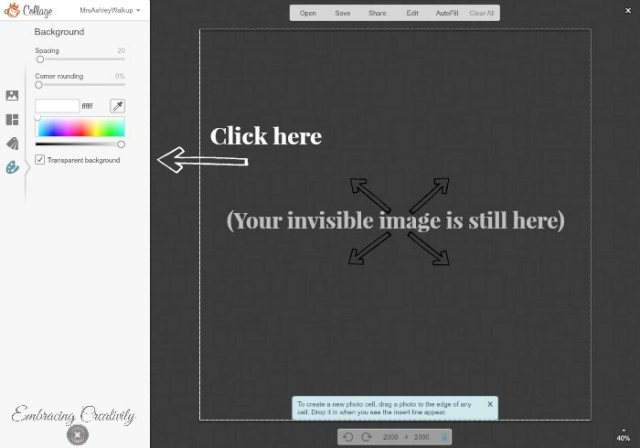
Click the Background tab and the check the box beside “Transparent background.” Don’t worry, your image is still there. It’s just invisible now.
Save your image using the “Save” at the top of the page, name your background image, then save it as a .png file. This is important, it has to be a .png file. You can now close the Collage editor by clicking on the “X” in the upper right hand corner of the page.
3.) Create a Logo
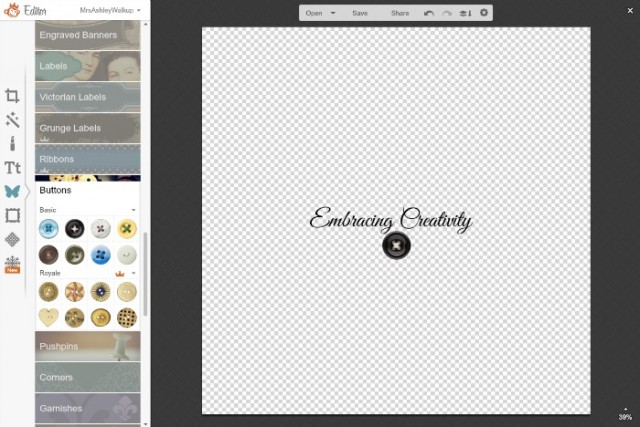
Use the Editor feature to open your transparent background file. Those boxes won’t be in your image; they’re just there to let you know the dimensions of your transparent image.
Click on the Text tab and add the text you want on your logo. Experiment with fonts to find one that’s easy to read and that best represents your brand. You can also change the color at this point but it’s common to use either black or white. Pick a font size that is fairly large, somewhere around 80-100 point should be good. You can always resize it smaller when you add it on top of your image but making it bigger would make it look grainy.
If you’d like to add an image with your name you can browse PicMonkey’s collection of overlays. For this tutorial I chose to add a black button and then rotated it slightly.
4.) Crop Your Logo
Once you’re happy with the way it looks go to the Basics tab and crop it tightly around your image.
5.) Save Your Transparent Watermark
Go now and save it to your computer as a .png file. It needs to be a .png file to be transparent so double check and make sure you’ve selected the right option.
That’s it! Now you can have a professional consistent look on all of your images. Don’t you feel savvy?
**Updated!** To add it to your image follow these steps:
– Go to the “Overlays” tab.
– Choose “Your Own” option at the top.
– Select your transparent .png file from wherever you saved it. Voila!
If you found this post helpful please pin it so others can find it!


Recent Comments