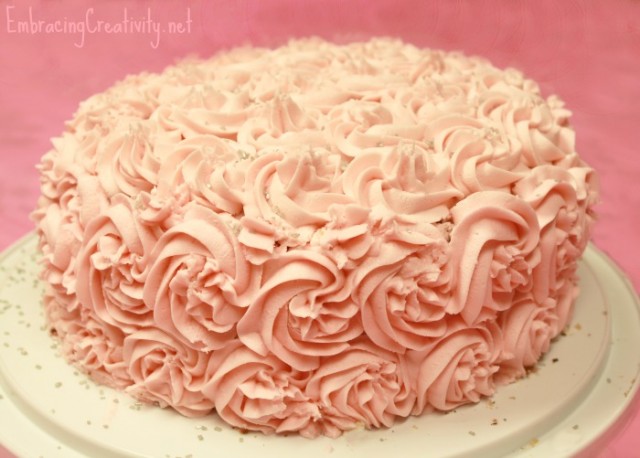
I’m a huge fan of roses and cakes so of course I love a cake covered in roses! I did a similar style rose for my daughter’s first birthday cake that had very tight roses (see Pink Lemonade cake). This cake, however, was made by my talented sister in law for one of her darling daughters. Isn’t it lovely?
Here’s a little tutorial on how to achieve this look…and one slightly different rose technique.
Basic Steps to Rose Building:
– Start with your cake and put a good crumb coat on. For those new to baking it’s just a coat of icing that conceals the cake underneath. This can be uneven and sloppy as long as you can’t see what color the cake is underneath.
– Add a M1 tip to your piping bag and fill with buttercream. If you don’t have an M1 tip any large star tip will do.
– My sister in law started on the outside of the flower and worked her way in so that the flowers popped out a little in the middle. This is a very cute look but if you’re going for a more authentic looking rose start in the center of the flower and slowly work your way around and around until you reach your desired size. Try to end your rose at the same place every time.
– If you used large roses (as I tend to do) you’ll be left with a few gaps inbetween your roses. That’s okay! I have a simple solution for them. Go in and add an extra swoop along side one of the roses. Simply follow the shape of the rose and release pressure before lifting the bag. Voila!
Simple tips to achieving beautiful rose success:
– Use a buttercream recipe that “crusts” well.
– Make sure you have a lot of icing on hand because these roses use a lot.
– Place your finished creation in the fridge to help the icing set and the roses hold their shape.
– If you want to make an ombre cake simply add a darker icing to your piping bag each row (or two) of roses.
– Don’t be so serious! Honestly, these roses are very forgiving so just have fun with them! Plus, if you mess them up you can just scrape them off and add them back to your piping bag and start again. See, that crumb coating does have a purpose!
If you have any questions please let me know and if you try out this technique yourself I would love to see pictures!!


How neat! I will have to keep this in mind next time I make a cake! Thank goodness it is easy enough to scrape away if you mess up because I sure know I will! 🙂
This is such a beautiful cake! I love it so much! I wish I was creative like this.
What a beautiful cake, I absolutely love it! Thanks for the tips and tutorial…. I generally stay 10 feet away from cake decor.. but this sounds too fun to not try!
This is absolutely gorgeous! I would love to try this.
That’s beautiful!!! I am afraid if I made something like this I wouldn’t let anyone eat it — it’s too pretty!!
That is so beautiful! I wish I was good with frosting. I stink! lol
That is beautiful! I really stink at cake decorating and am in awe of anyone who can do this!
That cake is absolutely beautiful. I’m going to show my mom since she’s the baker in the family!
I love baking and “Serious” cake decorating is something I’ve always wanted to get into. (And by “Serious” I mean something that looks better than this: http://www.supercoupongirl.com/grocery-challenge-meals-day-22-birthday-party-edition/ LOL!!) I have the supplies to start doing this type of decorating – now I just need to find the time to do it! This cake looks beautiful!
Very pretty! I am in a baking/pastry class and have been learning how to use pastry bags and tips!
oh, so pretty!! i love it
That’s gorgeous, and actually doesn’t look “too” hard, though I’m sure I wouldn’t be able to do it, lol.
Oh my goodness you make it sound so easy.I have to attempt this but maybe on a trial cake before I attempt a huge cake.
HOW beautiful… such a stunning cake… WOW .. are you sure I can make this>…?? WOW.. maybe I should just fly you here to make it… Thanks for a great tutorial, soo gonna give it a try and hope it will work
Oh what a beautiful cake! I wish I could do this stuff! Thanks for explaining so much, I never even knew to put on a crumb coat!
I just learned how to do this recently and it was super fun!!!! Your cake looks gorgeous!
That is gorgeous!