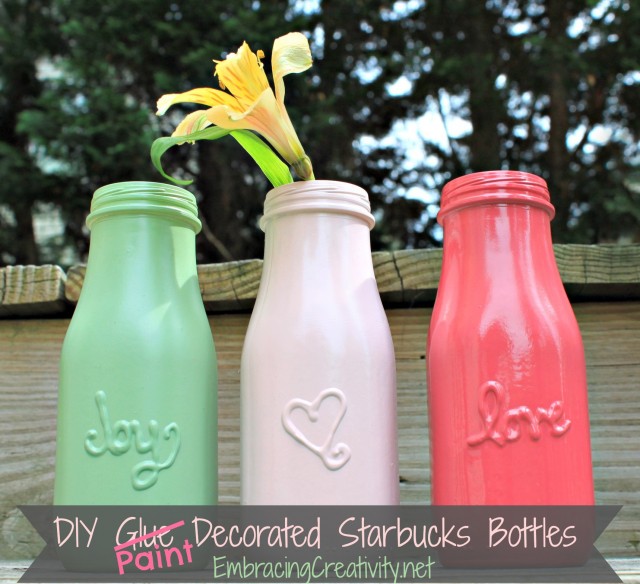
Let’s see a raise of hands, who in here has a love of Starbucks? I thought so, I love it too. For me, it’s only a treat for special occasions because my husband doesn’t like it, it’s costly, and it’s usually out of the way to get to one. However, I get the Starbucks bottles at Walmart about once a month. I’ll buy them if they have a coupon attached and I’m craving one or my husband will buy them for me when he knows I’ve had a hard week. Isn’t he the sweetest? I am very blessed to have him! Long story short, I have a small collection of Starbucks bottles accumulating at my house. After I collect 8 or so I force myself to put them in the recycling bin but it seems like such a shame wasting a perfectly good, beautifully shaped bottle. I don’t know why but I’m pretty much in love with the shape and size of their bottles. This brings me to why I’m writing here today, I’m going to show you how to repurpose old Starbucks bottles into a lovely home decor item.
Let’s begin, shall we?
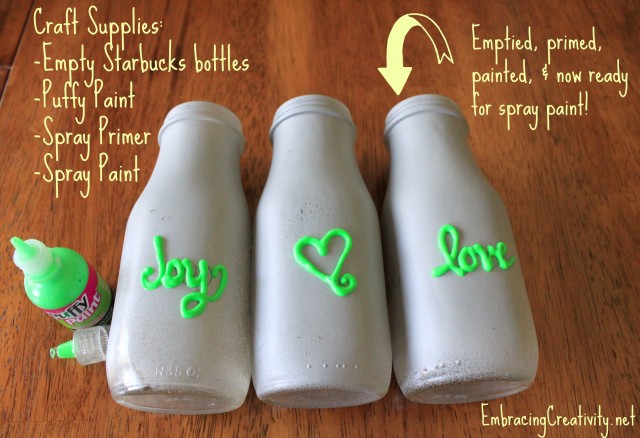
Here are the materials you’ll want to have on hand before you begin:
- -Starbucks bottles with the labels peeled off and washed clean.
- -Spray primer {this is optional but recommended if the bottle will be handled much}
- -Puffy paint {the color doesn’t matter}
- -Spray paint in all of the shades and finishes you want to use.
- -Sharpie
I’ve seen so many of these DIY bottle ideas on Pinterest but I while I love the idea I don’t like how the finished product looks. I think it’s because hot glue guns are so hard to manipulate and get precisely where you want it. One day it dawned on me, why not use a little bottle of paint? A small bottle that could fit in your hand seemed genius to me! My first trial run with this wasn’t a huge success because I bought a small squeeze bottle of paint but it wasn’t puffy paint and no matter how many coats I applied it still dried flat. Make sure you buy puffy paint!
I primed the bottles with the spray paint and because I’m a mom I waited a few days before I could get back to it. I believe that you should be fine to continue after a few hours but check the spray paint can just to be sure.
Next, I used a Sharpie to draw out the design I wanted. I was careful to draw the letters far apart, taking into account the thickness of the paint. Oh, I almost forgot! It’s not a huge deal but it kind of bothers me…make sure you turn your bottles so that you aren’t writing where there numbers or dots on the lower portion of your bottle. There are blank sides but for some reason this didn’t dawn on me until I was completely finished.
Then, I applied my Puffy Paint. This is very easy to do! I even did this while I was talking on the phone with my mom. If you’ve never worked with Puffy Paint before, it’s simple to use. It’s very similar to decorating a cake. You bring the tip to the bottle, squeeze slightly, then lift the tip up as you continue with light pressure slowly guiding the bottle around. You’ll want to use your arm to guide the bottle around and not your hand. I don’t mean to complicate this step, it’s really simple! Besides, if you mess up all you have to do it let it dry, peel it off, and start over.
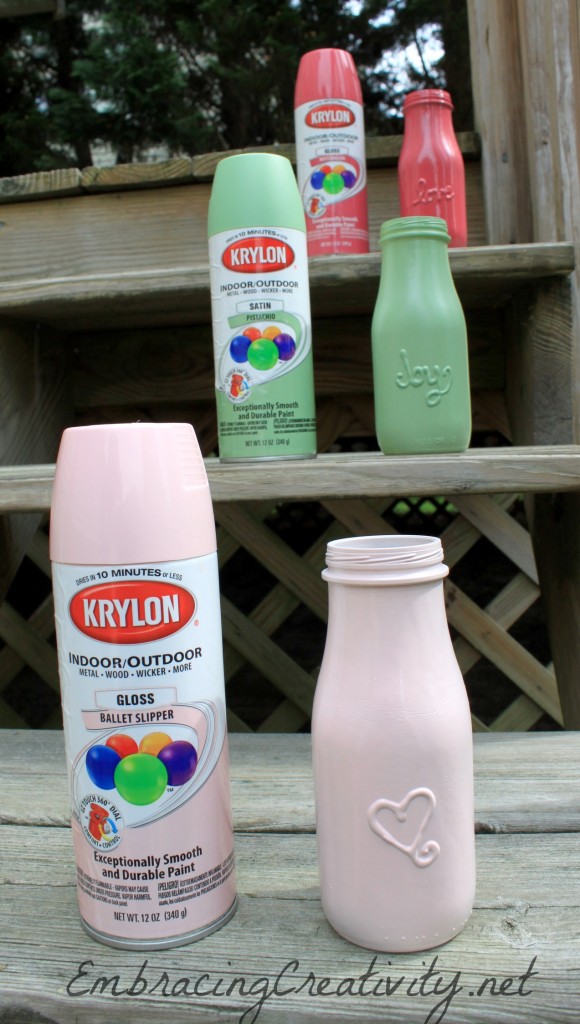
Now all that is left is the spray painting. I chose Krylon spray paint because this brand had three colors that I thought would go well together but you can use any brand or color that you like. I just applied one coat of each even though the can recommended two coats. Although, I skipped this step, if your bottle is going to be regularly used you’ll probably want to give it a coat of polyurethane.
There you have it, folks! Simple DIY Paint Decorated Bottles. I hope you like this tutorial and if you did please pin it to help share it with others.


Recent Comments