100 Days of School Shirt Idea

This post contains affiliate links for your convenience.

Do you remember being in elementary school and celebrating 100 days of school?  I do, I can remember it just like it was yesterday.  One of the teachers wore the same shirt every year.  Her shirt that had 100 sequins that she has sewn on.  The sequins looked just like these!  Oh, the memories.

The week that surrounded the 100th day of school was filled with fun counting projects.  I can remember a paper chain we made that had 100 links in it.  We of course counted out 100 pennies too.  I miss the innocence of elementary school sometimes.

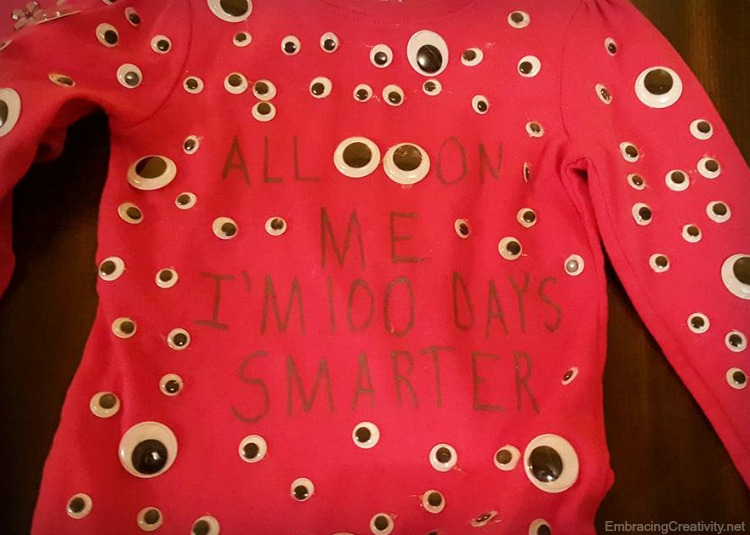
Nowadays I’ve noticed, via Facebook friends, that it’s customary to wear a hundred items on your shirt.  My elementary school teacher had it right all these years!  While I’m homeschooling and don’t find it necessary to craft a shirt just for one day for only my immediate family to see I thought I would share this cute 100 day of school shirt idea that my friend made for her daughter.

100 Days Shirt

She just glued of a 100 googly eyes and wrote on it.  Simply adorable!

It says, “All eyes on me.  I’m 100 days smarter.”  I just love it.  Mainly because I have an unexplainable love of googly eyes.  On second thought, maybe I’ll make this shirt for my daughter after all.  And one for myself. :)

Knitted Baby Dress Pattern

This post contains affiliate links.
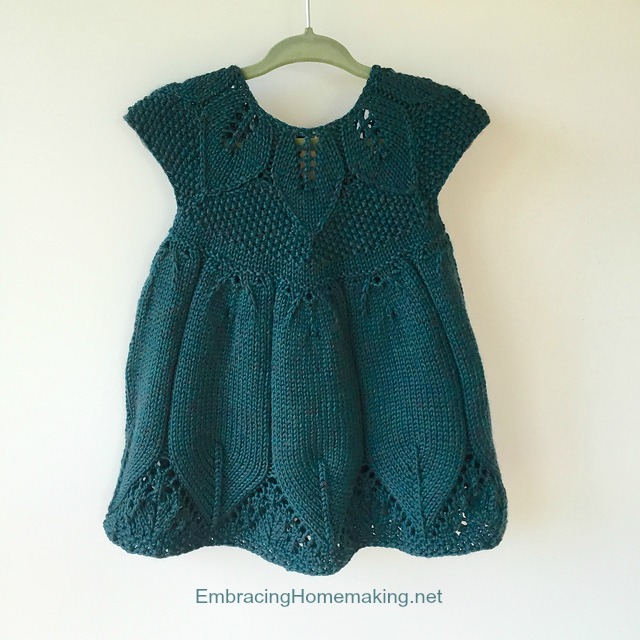
Knitted Baby Dress Pattern

Today is the second day of our 31 Days of Knitted Gifts!  Our previous two projects can be found here.  This sweet knitted dress is perfect for fall.  Just picture it paired with leggings and baby boots.  Absolutely adorable!  Oooh, and if you added stocking and gold shoes with a gold hair bow it would be perfect for Christmas!

Needle and yarn
Needle:

US 7 – 4.5 mm

Pattern: This free pattern can be found on Ravelry.com.

Notes:

Followed the listed pattern through row 27, doing seed stitch instead of ribbing between the leaves. On row 28 did 25 stitches in seed stitch, bound off 31, 50 seed stitch, bound of 31, 25 seed stitch (last stitch knit 2 together). Couple more rounds of seed stitch…then I knit 3 rounds in st st, one round of purl, and started Flora dress with 9 repeats of chart A.  I knit one round then 3 rounds of seed stitch to finish.

31 Days of Knitted Gifts

This post contains affiliate links.
31 Days of Knitted Gifts

This month I’ll be sharing a DIY knitted gift idea with all the details for making them.  I hope you’ll follow along with me.  {I’ll be posting the first one later today after I wake up a bit. tomorrow after I get some meds in me.  I hate being sick, I’m sorry!} :)

Knitted Booties Pattern

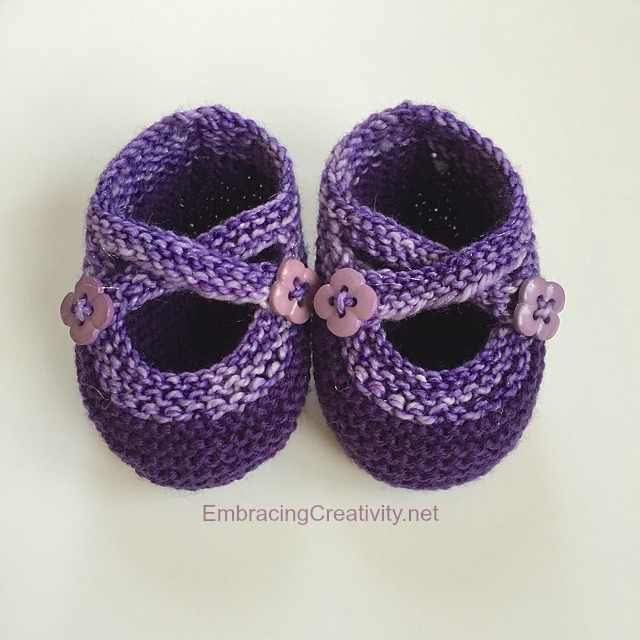
The first knitted project I have to share adorable little knitted booties to cover itty bitty little sweet baby feet!

Needle and yarn

In addition to the eggplant Knit Picks yarn there was a little hand-spun yarn (from a fiber festival) for the contrast color.

Pattern: From Ravelry.com (This one’s free!)

Notes:

There are lots of ends to weave in, but cute and easy.  I made the large size and they are still very tiny.

Here’s is the master list of 31 Days of Knitted Gifts:

Day 2: Baby Apple Hat

Day 3: Baby Dress

DIY Chandelier Planter

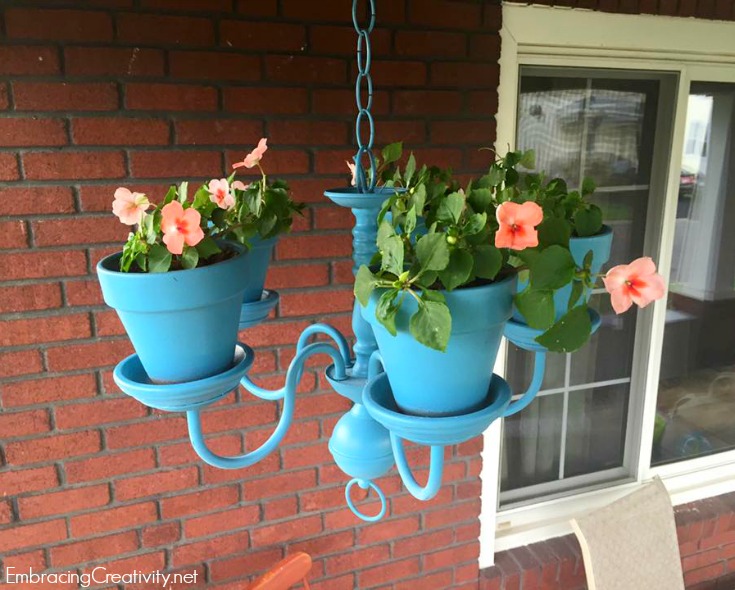
Chandelier Planter

A college friend of mine, Megan, showed me this chandelier planter that she created and I absolutely loved it.  She gave me permission to share her work of art with you and was kind enough to write out how she did it.  I’ll turn it over to her now.

I used an old brass chandelier that was laying around our basement.  I had my husband remove the electrical wiring and elements.  Then I glued a terra cotta saucer and pot to each other, and on each of the chandelier’s arms. I used Elmer’s Pro-Bond Advanced Glue. It’s supposed to work on any material, and it worked for my terra-cotta to metal combo!  I hung the chandelier when dry and painted with a paint/primer combo (Valspar Tropical Oasis). I finished mine with a clear enamel spray paint because I had some left over from another project, but I think a specific sealant spray would have been better. Super easy! I only had to pay for the pots, which are pretty cheap at Lowe’s, and a can of spray paint!

There you have it folks!  An easy, cost-effective way to add a little DIY charm to your home.

If you have a creative party, recipe, or DIY and would like to be featured on Embracing Creativity we would love to see it!  You can submit your creativeness here.

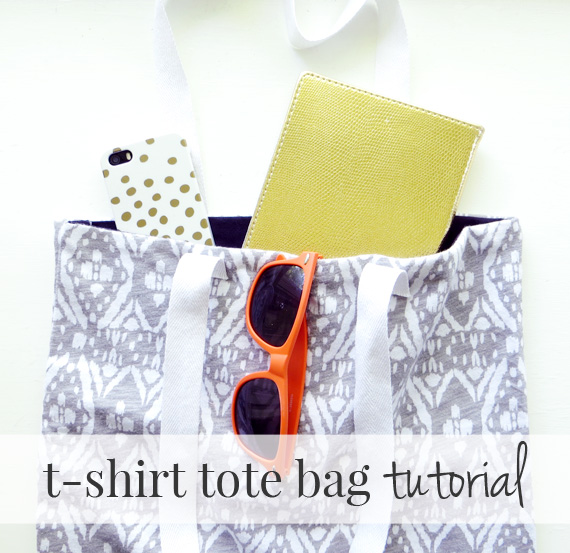
Homemade T-shirt Tote

t-shirt-tote

CreativeGreenLiving.com shows you how to make a homemade tote bag out of a old t-shirt.  Isn’t it adorable!?!  I’d love to make one (or ten) of these!

Preschool Letter Craft – F is for Flower

Because I’m a preschool homeschooling mom I’ve been told by countless mamas that I need to do letter crafts with my daughter.  I say that she knows her letters, their sounds, and can even sound out small words on her own.  They tell me that I still need to do this so that is what I’m doing.  Reinforcing the alphabet!

I probably should have started with the letter A but we had pretty silk flowers just sitting around waiting to be used so I jumped ahead to F.  The order of the alphabet isn’t too important at this age anyway, is it?

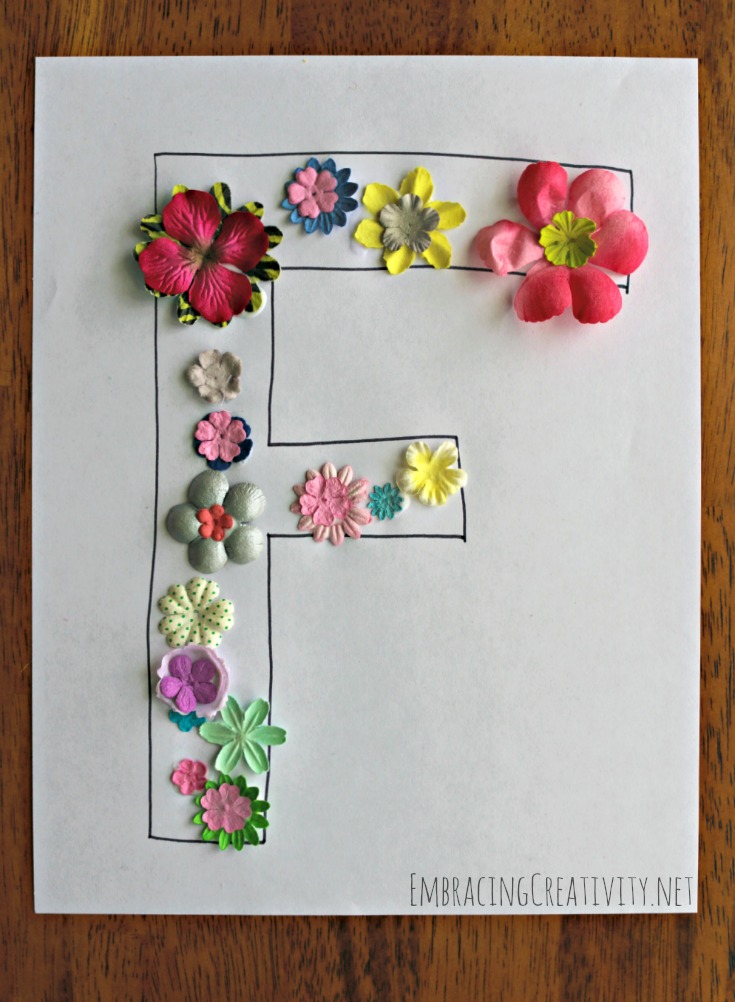
For our letter craft we added flowers to the letter F!  It’s self-explanatory really but here’s what we did.

Grabbed our tube of flowers.  We got them from Amazon here ages ago and they have lasted and lasted.  A good craft investment!  Gathered, paper, glue, and a marker for Mommy to write the letter F.

1.  Freehand the letter F.  If you’re OCD, like I have a tendency to be sometimes, I’m sure you could make a letter of humongous proportions in Word or Google for an F template.

2.  Let your kiddo pick out their favorite flowers.  Layer them, arrange them.

3.  Let them loose with the glue and voila!  Oh, and you might want to mention somewhere in there that flowers start with the letter F.

Happy crafting, ya’ll!

F is for Flower

Shamrock Bead Craft for Kids

This post contains affiliate links for your convenience. 

Shamrock Bead Craft for Kids

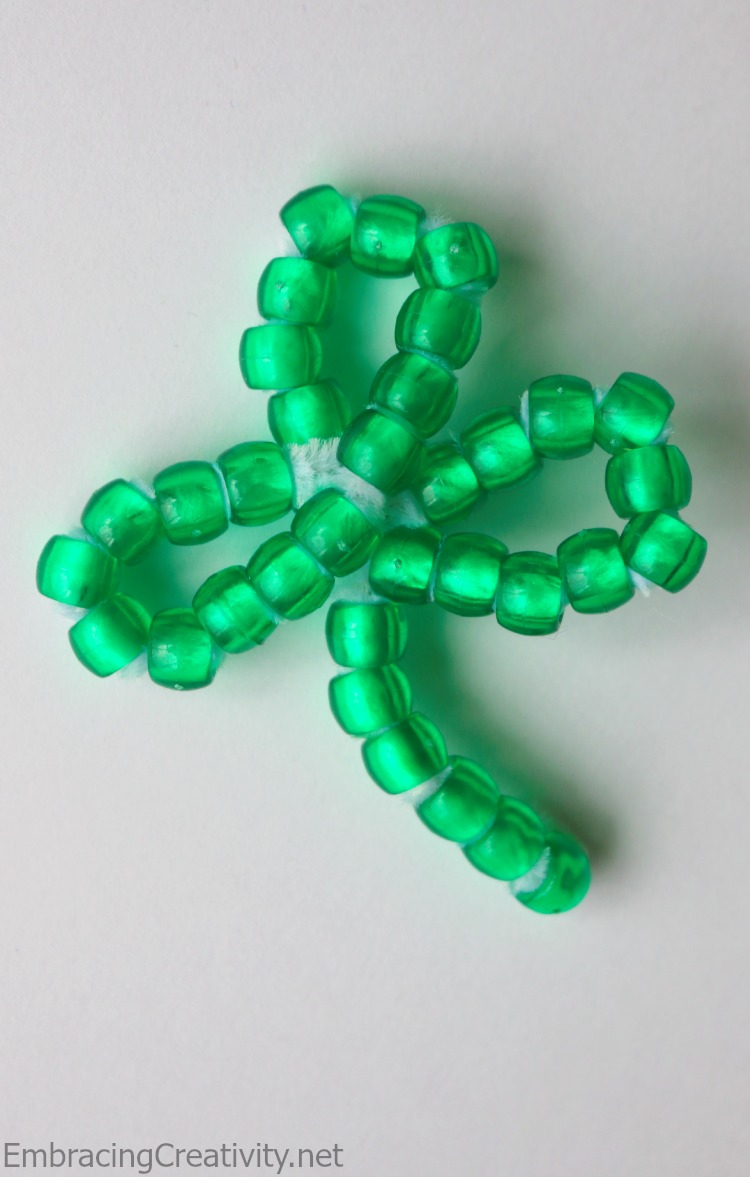
My daughter loves pony beads, I mean loves them!  Whether it’s stringing them on pipe cleaners or gluing them on paper.  She can’t get enough.  Maybe it’s because it’s one craft that she doesn’t need much help from me on.  I don’t mind because it’s a great exercise for her fine motor skills.

Yesterday, she asked to do a craft with beads.  After I scratched my brain for a moment I came up with this idea!  She loaded the pipe cleaner with beads and then I bent it into the shape of a shamrock.  We were originally going to hang it up as a sun catcher (with these suction cups) but she’s had too much fun carrying it around for that.

If you have a pony bead craft to share I’d love to hear about it!

Check out our other St. Patrick’s Day crafts:

St. Patrick’s Day Rainbow Craft

This post contains affiliate links.

St. Patrick's Day Rainbow Craft


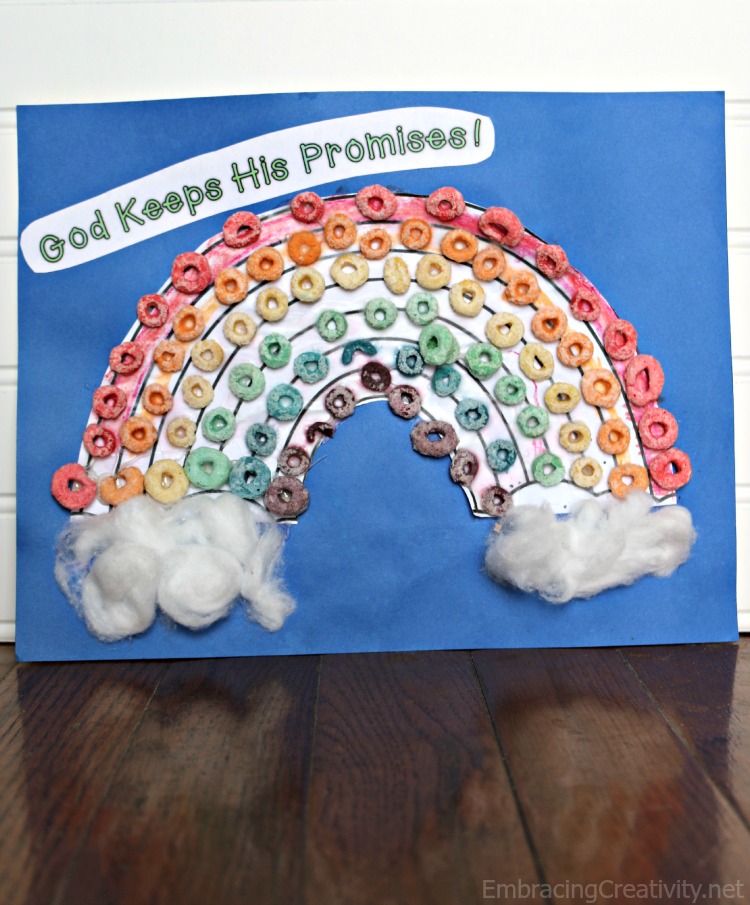
This lovely piece of art has been hanging on my refrigerator for almost a year now.  I just love it!  I can’t take credit for it though.  My daughter made this craft with the help of her Sunday School teacher.  The idea is simple enough though that I wanted to share it with you in case you have a little one that might enjoy a rainbow craft.  Paper, glue, crayons, Fruit Loops, and cotton balls are all you need for rainbow magic.

Check out our other St. Patrick’s Day crafts:

Frozen Olaf Pumpkin

Frozen Olaf Pumpkin

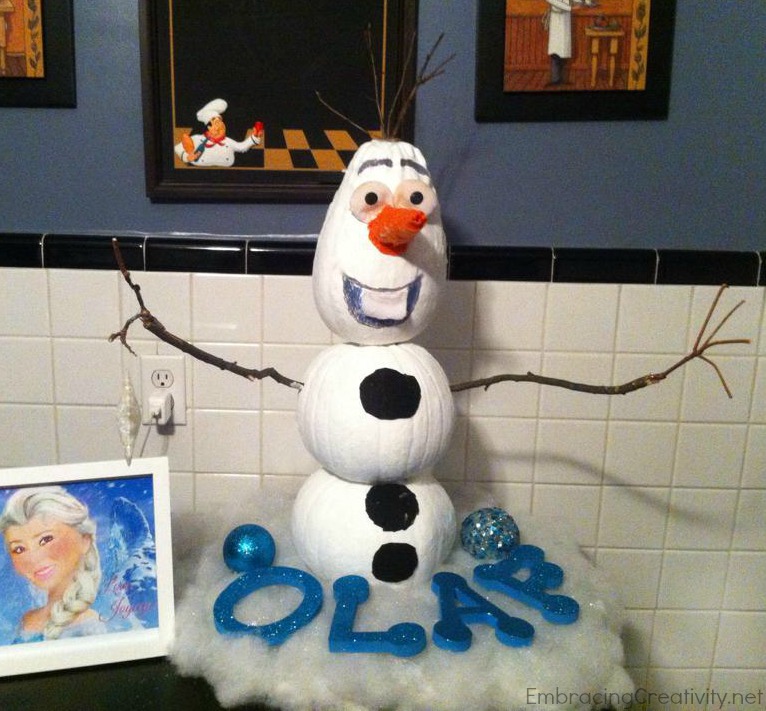
By now, you’ve already been bombarded with 5 dozen sweet Elsa’s knocking on your door to say trick-or-treat, you’ve already handed out all of your candy, and you may have even put away all of your Halloween decor.  I know, I know, it’s a little late to be posting about a pumpkin but this Olaf inspired pumpkin was too cute not to show you.  Isn’t it darling?  A friend of mine made this Olaf pumpkin with her sweet daughter and gave me permission to share it.  I just love it!

Leaf Craft for Kids

Leaves Craft

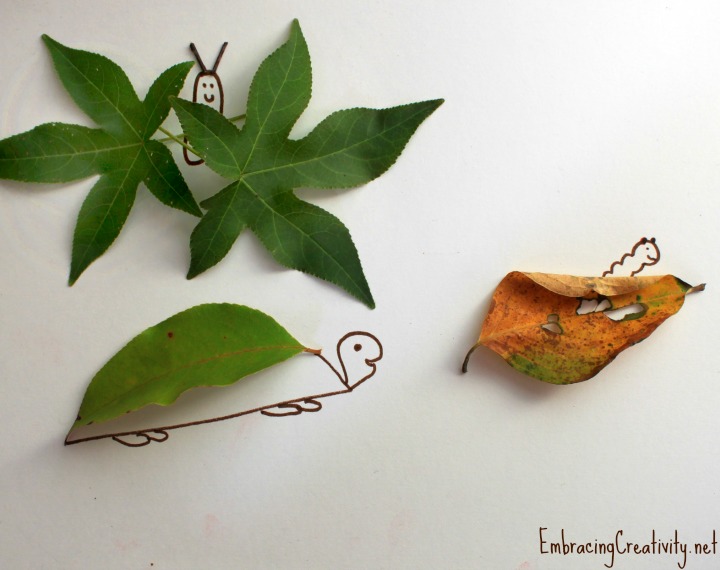
Now that fall is upon us our trees are starting to turn into the beautiful colors of autumn.  Instead of just raking up your leaves take a few minutes to enjoy them with this simple leaf craft for kids.  My daughter and I loved it!  It was fun to go outdoors, explore a little bit, and then come back inside to craft.  We tried crafting on the porch but it was too windy for that.

In case you can’t tell what my marvelous drawings are, one is a butterfly, one is a turtle, and one is a caterpillar who just took a bite out of that leaf.

Materials:

  • – Paper
  • – Pen/Marker
  • – Leaves
  • – Glue
  • – Small twigs (optional)

Directions:

Take a little stroll together around your yard and gather leaves of all sizes, shapes, and colors. Come back inside and lay out your treasures.

Come up with an animal or insect you would like to draw and play around with your leaves to see which ones resemble your animal.  Glue the leaves to the paper and then draw the remaining part of your picture.  Add small twigs or other crafty supplies to further embellish your creations.

You could draw a little caterpillar who ate his way through the leaf like I did on one of mine or you could draw a bunch of people and make them have crazy hair with leaves.  The options are endless.

Be silly, have fun, and enjoy nature!